
Tuesday, October 26, 2010
Back to the Loft Bed
Need to adjust the ends of the bed and install the slats. Then some fine sanding and paint.
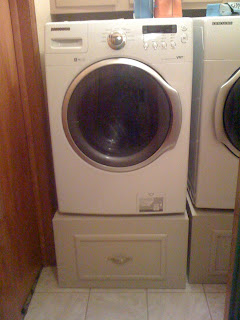
Pedestal Project - Finished
Delivered and installed today. Some touch-up on the paint maybe over the weekend.

Pedestal Project Day 3

Monday, October 25, 2010
Pedestal Project Day 2
Today, I finished the second pedestal. It went fairly quick, since most of the wood was cut. I was short some of the short braces. I also picked some trim for the faux drawers.
 So after assembling, sanding and putting on the side panels they were ready for a first coat of paint.
 And from the front with the bottom exposed. You can see how solid these puppies are.
 Luckily, we found some left over eggshell white paint. So that's what they color they will be. Tomorrow is a final top coat of paint and they should be ready for the delivery of the washer and dryer on Tuesday.


Saturday, October 23, 2010
Pedestal Project Day 1
The pedestals need to be beefy and solid. They will be holding nearly 400 lbs between the machine, the water and clothes. So 2x4's and 3/4" plywood. So a quick trip to Lowes for supplies and some time on the miter saw everything was cut.
 Some quality time with my Kreg Pocket Hole Jig had me ready to start assembly.

And then assembling the internal structure - I warned you it was beefy.
 After attached the skeleton structure added the top and front of 3/4" oak plywood left.
 Here it is from the back. You can see how solid the pedestal is. It still needs a thin sheet on the sides. I will leave the back open. And all that's left is to add the trip to the front and paint it. That will have to wait until tomorrow.


And then assembling the internal structure - I warned you it was beefy.


Project Interuptus...
Our washer and dryer died. They were old and came with the house when we moved. 18 months of service with no complaints. So we have to replace them. We went with a front loading washer and dryer. But they wanted another $460 for pedestals. I found some plans on line to build them myself (naturally). So instead of finishing the loft bed, I'll be building pedestals this weekend.
The first plan I found was on instructables.com
 It was a good start but didn't like the open look. We didn't want or need a drawer but wanted it look a more finished. A little more searching found this design at www.thepennyparlor.com:
 Almost perfect but we wanted separate pedestals not a single unit. You can see their design here.
So based on their design, I'll be making two separate pedestals. I estimate the cost $70 for both.
The first plan I found was on instructables.com

So based on their design, I'll be making two separate pedestals. I estimate the cost $70 for both.
Sunday, October 3, 2010
Let There Be Light
Our kitchen light fixture wasn't working. I finally got around to checking out if it was fixture, the wiring or the switch. The fixture was the issue. A quick to Lowes for a new fixture and got it up and working at least for now. I only wired up the one switch. But for now, it works.


Loft Bed Post 2
Here is the correct front of the loft bed. The ladder is wider (compare it to here).
The puttied areas and the rest of the bed need sanding, staining, disassembling and installed.

The puttied areas and the rest of the bed need sanding, staining, disassembling and installed.
Loft Bed Corrections
Repeat after me: A 2" x4" is 3.5" not 2.5" wide. That mistake cost me 2" from the length of the bed. I can offset the end pieces by an inch to recover but it was a dumb mistake that if I bothered to measure could have been (and should have been) avoided. Measure twice, cut once.
Other than that it looks pretty good. I demo'ed the original ladder which was only 13" wide. I made it 20" now. It looks better, is more stable, and someone over the age of 7 can get up into the bed.
I puttied some holes and filled some cracks. On to the sanding and staining. I put some of the desk together using left over wood. It should be nice and big. Pictures tomorrow.
Sunday, September 26, 2010
Loft Bed Post 1
Today we started the loft bed for our daughter's bed room. She wanted bunk beds with a twin over a full. We talked her into just a full loft bed and we'll put a desk and bookcase underneath. She was OK with that. I used one of Ana White's plans as the basis for the loft bed. Here is the plan.
I made a few changes to to Ana White's plans:


I made a few changes to to Ana White's plans:
- I raised it from 63 to 70 inches.
- It's a full bed so it's bigger 54"x75".
- 2x4's instead of 1x4's for the legs
- 3 1x4's at the top and 1 2x4 instead of another set of 3 1x4's.
- 2x3's for the ladder steps.
Hopefully my math was correct and the measurements will work. So far so good.

All the boards measured and cut.

The back section. Need to add the lower cross 2x4.

The start of the front ladder. Need to add the other leg and cross pieces.
Tuesday, September 14, 2010
Finish the Night Stand
This is a night stand i made for my daughter. She picked the colors. I learned a lot with this starter project - see previous post. I was able to correct most of the issues and it,s solid Plus she's happy with it and that's what matters.


Tuesday, September 7, 2010
Many Explatives Later - Lesson #1
OK, I am working on the side tables. I picked up a Circular Saw @ Sears. Good price, of course it went on sale the next day for $30. So, I'll have to go back to get the $10 back. So I looked up on-line how to make straight cuts. Easy right? Just measure the distance from the cut to the edge of the base plate, line up a carpenters square on the line, cut away. Except I didn't account for the width of the blade. See my handy dandy diagram. So, this first table has a few gaps. Learned a lesson. Move on.


Friday, September 3, 2010
Started Cutting the Table Pieces
Tonight I was able to do must of the cuts for the side tables. I was able to cut everything from the 1x2, 1x3 and 1x6 boards with my mitre saw. But for the 1x10, 1x12 and plywood I need to get a circular saw. I just can't seem to decide.
Thursday, September 2, 2010
Stick a Fork in it....
The door is back up and the baseboard heat's cover is back in place. My work is done repairing the leaky faucet. Now on to the bedside tables. I got the plans HERE.
Monday, August 30, 2010

The Final Stretch
Only a few odds and ends left to deal with. Install the baseboard and re-hang the door. Without further adieu < obligatory drum roll >


Punch List for BRFH 2010
Things left to do:
Molding around the new floor tile and the wall tile.Caulk the tile, tub and toilet.Check the vanity top to make sure it's smooth.Install the vanity - cutting access holes for pipe.Establish the layout of sink.Install the sink and faucet.- Install new hardware on doors and install them back on the vanity.
- Find some shelves and install in place of medicine cabinet.
- Put up the shower curtain.
- Decorate with tray and knick-knacks we picked up on clearance at Pier 1.
- Re-hang the door
Sunday, August 29, 2010
Easy Three Step Sunday.
Step 1. Go to Lowes three times. First to pick up hole saws - one for the sink drain and one for the faucet. Of course, they can't be the same size. Second trip to Lowes look for some longer hoses or way to connect the wrong connector from the wall and an extension for the drain. Wrong size (of course), so back to Lowes for a third time. This time got the correct size ( 1 1/4" ) drain. And a very cool older guy showed me how to correct the hose problem. Use a nipple to connect two hoses to correct both the length issue and the coupling issue.

Step 2. Rough out the back of the vanity for access to the pipes. Drill the holes for the sink and faucet. Install everything onto the vanity and position it by the wall.
 After connecting the drain and the water connections this is how it looked under the vanity. Kind of ugly but it will get the job done.

Step 3. Test the connections and yes it works! Actually it took about a dozen attempt to get all the leaks fixed. But, yes it does work.
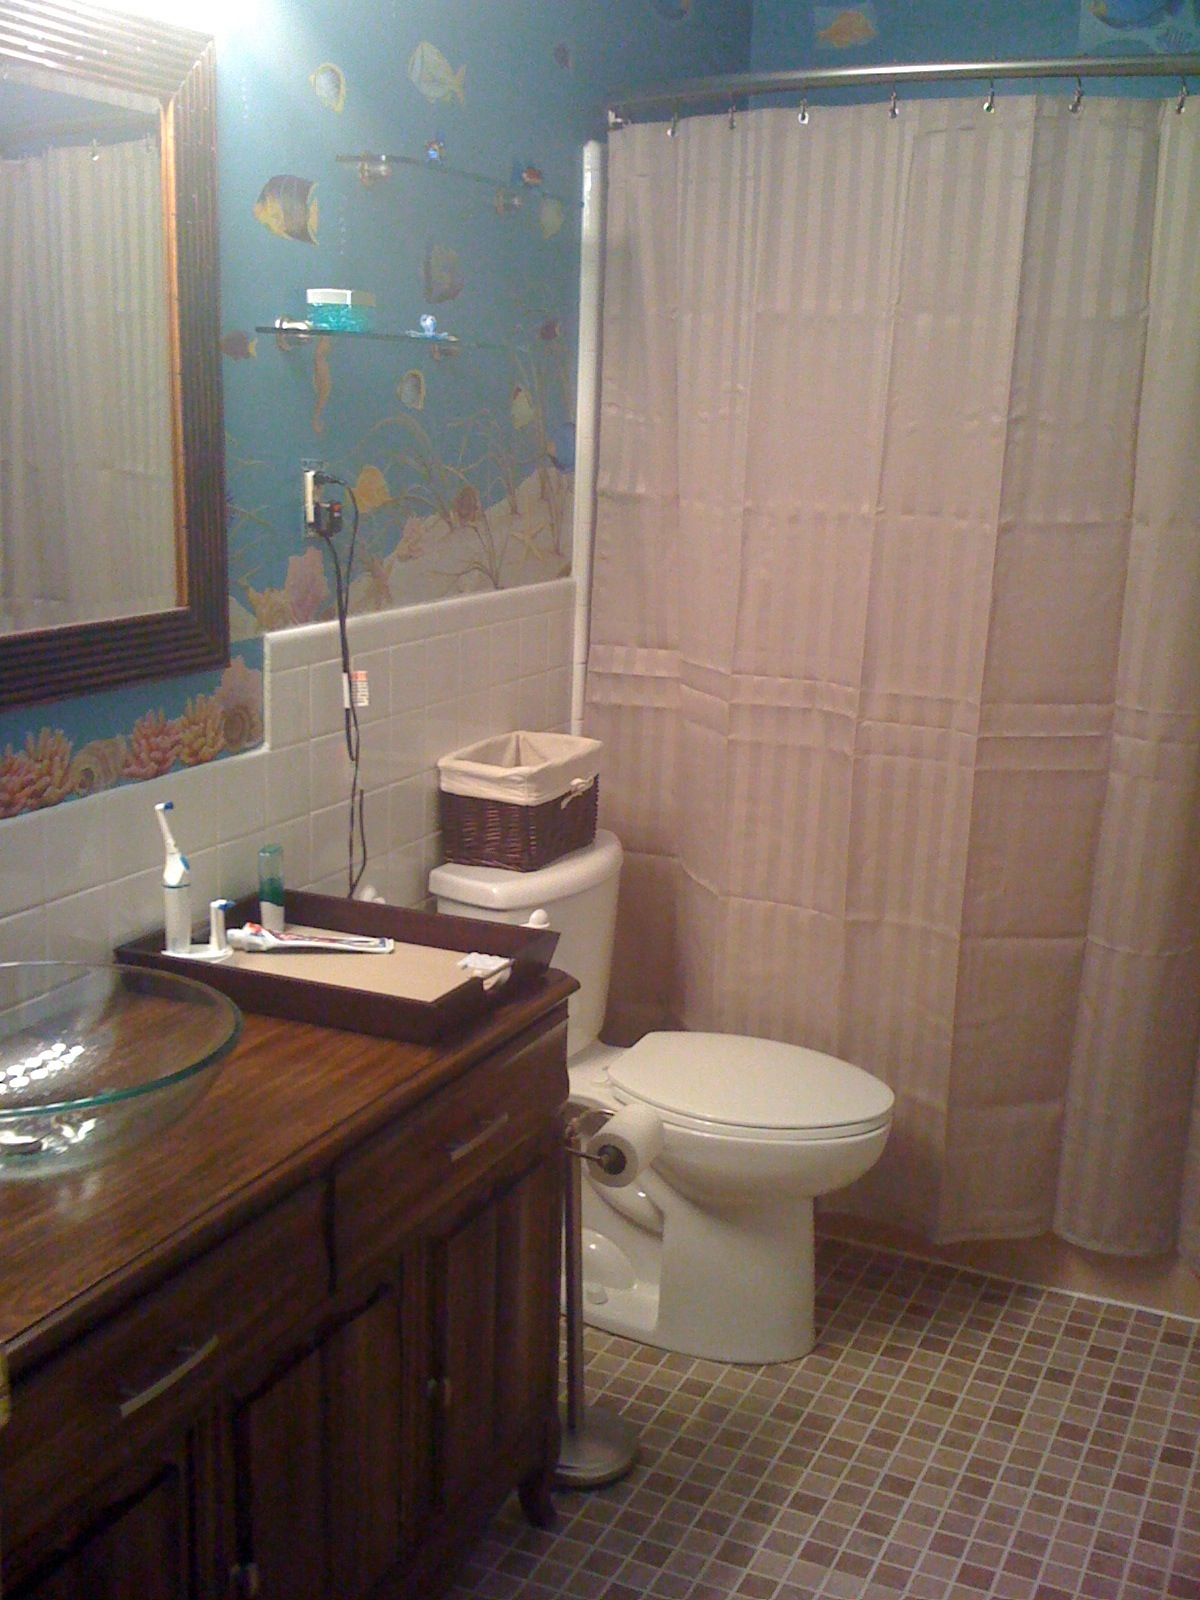
 Here is how it looks installed with everything is but the doors. We did lose one drawer to accommodate plumbing. So we cut out the back of the drawer under the sink. Just need to put in the doors and the vanity is done.


Step 2. Rough out the back of the vanity for access to the pipes. Drill the holes for the sink and faucet. Install everything onto the vanity and position it by the wall.


Step 3. Test the connections and yes it works! Actually it took about a dozen attempt to get all the leaks fixed. But, yes it does work.


Saturday, August 28, 2010
Slow but some Progress
The new sink and faucet arrived. It's very cool. Cooler that I thought it might be. Here is a peek at the new faucet. It's just sitting on a old wine box in the garage.

Tammy's been updating the walls with new fish, some shells and starfish. We looked to install the medicine cabinet and well. It just doesn't work. In order to look good it's has to be put up so high that it's useless. So now what? We are thinking some shelves instead of the medicine cabinet.


The walls look great. Even after we caulked. OK, for anyone who doesn't know this... caulking sucks. Plain and simple it just sucks. I hate it. End of rant.
New List of Things left to do:
Molding around the new floor tile and the wall tile.Caulk the tile, tub and toilet.- Check the vanity top to make sure it's smooth.
- Install the vanity - cutting access holes for pipe.
- Establish the layout of sink.
- Install the sink and faucet.
- Find some shelves and install in place of medicine cabinet.
- Put up the shower curtain.
- Decorate with tray and knick-knacks we picked up on clearance at Pier 1.
- Stick a fork in it - cuz it's done.
Tuesday, August 24, 2010
The NEXT Project: Bedside Tables
Maddie requested a table for next to her bed. So "she could have a place for her clock on top and a shelf below for storage." I found an awesome site Knock-Off Wood that had a free plan for a table just like it and it had a drawer as well.


To Do List
Things left to do:
- Molding around the new floor tile and the wall tile.
- Caulk the tile, tub and toilet.
- Install the vanity - cutting access holes for pipe.
- Establish the layout of sink.
- Install the sink and faucet.
- Install a floating shelf between the vanity and mirror.
- Put up the shower curtain.
- Decorate with tray and knick-knacks.
While We Wait...
The sink will be here in 4 - 9 days. It's being shipped UPS Ground. So a little more detailed work has been done. It's the basis for the color selections. Using wall art from Tatouage the room now has a whole new look and feel. The art make the wall color pops!


Change in Plans
The vessel sink we got for the bathroom didn't fit with the faucet we picked up on Craigs List. On to Plan B. Ebay had a package vessel sink, faucet, drain combo - for about what we paid for the sink and drain. This is what it looks like. The faucet it funky.


Wednesday, August 18, 2010
New Toilet In Da House
Picked the longer line and it was installed and working in less than 5 minutes. OK, maybe 10. The vanity got a first coat of polyurethane while Tammy painted some baseboard and trim. There does seem to be light at the end of this DIY tunnel.

Monday, August 16, 2010
New Toilet and Shower Curtain
The toilet went in easily except the old one was standard height and the new one has a higher seat. Because of the difference, the line from the valve to the tank wasn't long enough. Another trip to Lowes to get that part tomorrow and it should be all set. While at Lowes tonight, (Yes we went to Lowes tonight and then found out we needed the new line), we picked up caulk and a new double rod curved shower curtain. I have a feeling they are going to call us by first name before long. We are in there a couple of times a week.

 Tomorrow finish the toilet, caulk the all the tile, and then on to polyurethane the vanity and medicine cabinet.


Sunday, August 15, 2010
Progress Slows Because of the Weather
The heat and humidity left the stain on the vanity still tacky. So we wired and hung the new light fixture (Wow is it bright!) and hung the new mirror. With the fixtures up the wall imperfections seemed to be less noticeable. Sealing the floor tile will let us put replace the toilet and then it's all about getting the vanity finished. Hopefully the stained vanity will dry enough to allow for the multiple coats polyurethane to be applied.


Vanity Almost Finished Except for the Polyurethain Coats
The vanity has been exceeding our expectations and since the wood looked so good we decided to go with a vessel sink. Here is the latest progress with the dark finish and the type of sink we're going with.


The Vanity Refinishing Progress
Step by step we work on getting the vanity into shape. The top looked good enough that we started stripping the doors, drawers and the rest of the piece.


Subscribe to:
Posts (Atom)